
Today, I am going to show you a tutorial on building a layout that I created for Scrappin Studio using the SC March "Into The Woods" kit.

First, using your circle punch... punch circles out of the selected patterned papers.

Lay & paste out all the punched circles onto the kraft cardstock. There's a reason why I chose circles because I want them to represent big buttons to match the title... scroll down & you'll see :)

Use a baby wipe/wet tissue to dip into the gesso...

... and spread it across the layout.

Yup...you'll get a white-washed background.
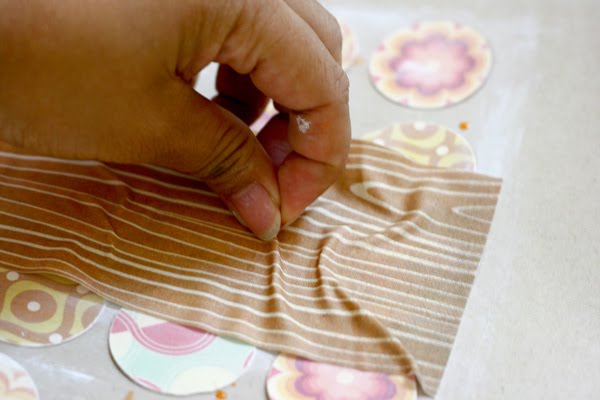
Paste the fabRips on and pinch to create texture.
Tip: You need to cut the fabRips length slightly longer.

Take out the nozzle from the mist bottle and drop some on all over the layout.

To create the flower, you need to do the first loop with the ribbon (Mossy Knoll kit)...

... and continue to loop in every direction.


Embellish the rest with photos, ribbon flower and stickers!
Ta daa.... here's the completed layout:

Close up shots:


Hope you'll try it out but for now remember to get a yourself a March "Into The Woods" kit!! Most importantly enjoy the process of creating!
BTW, if you interested to subscribe thru Scrappin Studio. Good news that we ship kits/products all around. And now we have special promotion just for you! Remember to mention my name cause I get brownie points *wink*! TQ

Xoxo Jessy
2 comments:
Oohhh fab tutorial!! Tfs beb. Love the gesso background!!! :)))
Your tutorial is just fantastic. I love the way how you used the fab strip. Thanks for sharing!!
Post a Comment