Let's get started...
You need to get these items prepared before you can start.
 |
| *Fabric ribbon length - 1 yard min.* |
 |
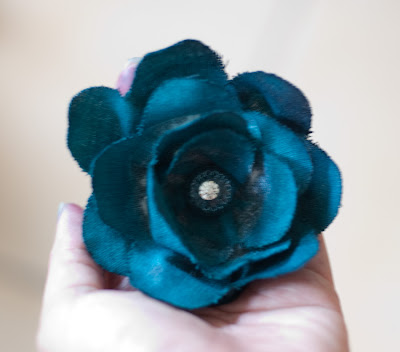
| The bloom we are going to make will be similar like this! |
STEP ONE: With the backing cardboard you have cut or punch, roll in some glue dot liner. I prefer glue dot liner because if in the process I don't like the twirl, I can still pull it out and twirl again. Below pictures, you can see how I started twirling along the edge of the 2" backing.
 |
| Side View |
 |
| Bottom View |
 |
| Front View |
STEP THREE: Put it a side for making sure the glue is all dry and flower is all set before we gets our hand and fingers dirty!
 |
| Don't you find the bloom does looks like one of Prima's flower :D |
STEP FOUR: Open up your zip-lock bag. Spray in your desire color mist. You can mix in a few color or you can stay with just one color. This will be the fun part.
STEP SIX: Can you see, when you dye your flower in the bag, you have a very good coverage of mist soaking into the fabrics. You can either leave it as is it or you can follow me, adding more mist to blend in the initial dark color. I prefer to use glimmer mist for my next step to give my flower more glimmer onto the fabric.
 |
| Give it a good spray and you will be please with the end result! |
 |
| I love this BIG bloom, so awesome if you want to make it as a headpiece or into one of your altered project. |
I hope you find this tutorial interesting and would love to see your creation someday!
TIPS: What about the left over fabric ribbon? I know it can be too short to start another bloom but not to worry, I will show you what you can create with the left over fabrics. Below pictures, shown I have dyed the ribbons with same color. How do I get the lighter color? Simple! Just add some water into the mist and get it dilute.
Here is what I have created with the left over ribbon!
Hope you like my second part of tips. Thanks for looking!


6 comments:
awesome blooms....let's get our hands dirty!!!
Gorgeous blooms & card too!
Hey beb tfs an awesome tute!!! You're amazing with those handmade flowers!! Love em so much!!! :)))
Thank you for showing this! I'm going to give it a try. Love what you've created!
Jaime this is so awesome! The blooms you made are gorgeous. I can't wait to try it. Love the cool card too, great idea. I'm so inspired :)
Awesome Jaime, I really like this tutorial so details and very clear...I will try one day ha...
Post a Comment